
라벨 QT5 예제입니다.
아래 사이트의 QT 강좌를 공부하며 정리 차원에서 작성하는 포스트입니다.
2021. 08. 12 - 최초작성
터미널에서 빌드 및 실행을 진행합니다. 편집기는 익숙한 것을 사용하세요.
1. 프로젝트 파일들을 저장할 디렉토리를 생성하고 이동합니다.
pi@raspberrypi:~ $ mkdir QLabel_Example
pi@raspberrypi:~ $ cd QLabel_Example
2. label.cpp 파일을 생성하여 다음 코드를 복사하여 붙여넣기합니다.
| #include <QWidget> #include <QApplication> #include <QPushButton> #include <QLabel> #include <QGridLayout> class MainWindow : public QWidget { public: MainWindow(QWidget *parent = nullptr); void OnPlus(); void OnMinus(); private: QLabel *label; }; MainWindow::MainWindow(QWidget *parent) : QWidget(parent) { auto *plusButton = new QPushButton("+", this); auto *minusButton = new QPushButton("-", this); label = new QLabel("0", this); auto *grid = new QGridLayout(this); grid->addWidget(plusButton, 0, 0); grid->addWidget(minusButton, 0, 1); grid->addWidget(label, 1, 1); setLayout(grid); connect(plusButton, &QPushButton::clicked, this, &MainWindow::OnPlus); connect(minusButton, &QPushButton::clicked, this, &MainWindow::OnMinus); } void MainWindow::OnPlus() { int value = label->text().toInt(); value++; label->setText(QString::number(value)); } void MainWindow::OnMinus() { int value = label->text().toInt(); value--; label->setText(QString::number(value)); } int main(int argc, char *argv[]) { QApplication app(argc, argv); MainWindow window; window.resize(300, 190); window.setWindowTitle("Plus minus"); window.show(); return app.exec(); } |
class MainWindow : public QWidget {
………………………………..
void OnPlus();
void OnMinus();
private:
QLabel *label;
};
MainWindow 클래스에 버튼 클릭하면 숫자를 변경하여 보여줄 QLabel 객체를 선언하고,
버튼 클릭시 QLabel에 변경된 숫자를 보여줄 때 호출되는 두 개의 함수를 선언합니다.
+버튼과 -버튼 2개가 있기 때문에 함수도 2개가 필요합니다.
auto *plusButton = new QPushButton("+", this);
auto *minusButton = new QPushButton("-", this);
label = new QLabel("0", this);
2개의 버튼과 1개의 라벨 객체를 생성합니다.
라벨에 초기값으로 0을 보여주도록 합니다.
auto *grid = new QGridLayout(this);
grid->addWidget(plusButton, 0, 0);
grid->addWidget(minusButton, 0, 1);
grid->addWidget(label, 1, 1);
그리드 레이아웃 객체를 생성하여 버튼 2개(첫번째 줄의 첫번째 칸에 +버튼, 두번째 칸에 -버튼)을 배치하고
숫자를 보여줄 라벨을 두번째 줄 두번째 칸에 배치합니다.
setLayout(grid);
위젯에 그리드 레이아웃을 적용해줍니다.
connect(plusButton, &QPushButton::clicked, this, &MainWindow::OnPlus);
connect(minusButton, &QPushButton::clicked, this, &MainWindow::OnMinus);
버튼(plusButton)를 클릭하면 QPushButton::clicked 시그널(SIGNAL)이 발생하며 이때 지정한 슬롯(SLOT)이 수행됩니다.
여기에서는 위젯 객체(this)의 MainWindow::OnPlus 함수가 실행됩니다. .
버튼(minusButton)도 같은 방식으로 동작합니다.
void MainWindow::OnPlus() {
int value = label->text().toInt();
value++;
label->setText(QString::number(value));
}
void MainWindow::OnMinus() {
int value = label->text().toInt();
value--;
label->setText(QString::number(value));
}
클릭된 버튼에 따라 호출되는 함수들입니다. 현재 라벨의 값을 가져와서 값을 증가/감소한 후,
다시 라벨의 값으로 변경합니다.
3. qmake -project 명령을 사용하면 qt 프로젝트 파일을 생성해줍니다.
프로젝트를 구성하는 파일의 정보를 가지고 확장자가 pro인 파일이 자동으로 생성합니다.
pi@raspberrypi:~/QLabel_Example $ qmake -project
pi@raspberrypi:~/QLabel_Example $ ls
label.cpp QLabel_Example.pro
4. 확장자가 pro인 qt 프로젝트 파일이 생성될 때, qt 코드에서 사용중인 qt 모듈 이름이 자동으로 추가되지 않습니다.
일단 진행해보고 컴파일 에러가 나면 qt 프로젝트 파일을 열어서 사용중인 qt 모듈 이름을 추가해줘야 합니다.
다음 한줄을 추가합니다.
QT += widgets
5. qmake 명령으로 Makefile을 생성합니다.
pi@raspberrypi:~/QLabel_Example $ qmake
Info: creating stash file /home/pi/QLabel_Example/.qmake.stash
pi@raspberrypi:~/QLabel_Example $ ls
label.cpp Makefile QLabel_Example.pro
6. make 명령은 Makefile에 기술된대로 컴파일 및 링크를 실행합니다.
pi@raspberrypi:~/QLabel_Example $ make
g++ -c -pipe -O2 -Wall -W -D_REENTRANT -fPIC -DQT_DEPRECATED_WARNINGS -DQT_NO_DEBUG -DQT_WIDGETS_LIB -DQT_GUI_LIB -DQT_CORE_LIB -I. -I. -isystem /usr/include/arm-linux-gnueabihf/qt5 -isystem /usr/include/arm-linux-gnueabihf/qt5/QtWidgets -isystem /usr/include/arm-linux-gnueabihf/qt5/QtGui -isystem /usr/include/arm-linux-gnueabihf/qt5/QtCore -I. -I/usr/lib/arm-linux-gnueabihf/qt5/mkspecs/linux-g++ -o label.o label.cpp
g++ -Wl,-O1 -o QLabel_Example label.o -lQt5Widgets -lQt5Gui -lQt5Core -lGLESv2 -lpthread -latomic
중간 결과물인 확장자 .o인 오브젝트 파일과 프로젝트 디렉토리와 동일한 이름을 갖는 실행파일이 생성되었습니다.
pi@raspberrypi:~/QLabel_Example $ ls
label.cpp label.o Makefile QLabel_Example QLabel_Example.pro
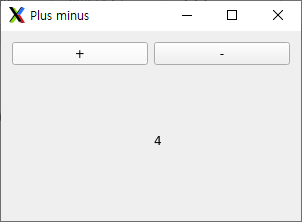
이제 실행시켜 보면 윈도우가 보이며 + 버튼, - 버튼을 누르때 마다 숫자가 증가 또는 감소합니다.
pi@raspberrypi:~/QLabel_Example $ ./QLabel_Example

QT 강좌 01 - Hello World
https://webnautes.tistory.com/1859
QT 강좌 02 - Simple GUI
https://webnautes.tistory.com/1860
QT 강좌 03 - Push Button
https://webnautes.tistory.com/1861
QT 강좌 04 - QLabel
https://webnautes.tistory.com/1862
QT 강좌 05 - QMenu
https://webnautes.tistory.com/1863
QT 강좌 06 - QToolBar
https://webnautes.tistory.com/1864
QT 강좌 07 - QVBoxLayout, QHBoxLayout
https://webnautes.tistory.com/1865
QT 강좌 08 - Button
https://webnautes.tistory.com/1866
QT 강좌 09 - QListWidget
https://webnautes.tistory.com/1867
QT 강좌 10 - QFormLayout
https://webnautes.tistory.com/1868
QT 강좌 11 - QGridLayout
https://webnautes.tistory.com/1869
QT 강좌 12 - QGridLayout 2
https://webnautes.tistory.com/1870
'Qt > Qt 강좌' 카테고리의 다른 글
| QT 강좌 06 - QToolBar (0) | 2023.10.05 |
|---|---|
| QT 강좌 05 - QMenu (0) | 2023.10.05 |
| QT 강좌 03 - Push Button (0) | 2023.10.05 |
| QT 강좌 02 - Simple GUI (0) | 2023.10.05 |
| QT 강좌 01 - Hello World (0) | 2023.10.05 |
시간날때마다 틈틈이 이것저것 해보며 블로그에 글을 남깁니다.
블로그의 문서는 종종 최신 버전으로 업데이트됩니다.
여유 시간이 날때 진행하는 거라 언제 진행될지는 알 수 없습니다.
영화,책, 생각등을 올리는 블로그도 운영하고 있습니다.
https://freewriting2024.tistory.com
제가 쓴 책도 한번 검토해보세요 ^^