

안드로이드 앱에 AdMob 배너 광고를 다는 방법을 설명합니다.
마지막 업데이트 : 2019. 7. 4
1. https://www.google.co.kr/ads/admob/ 에 가입후 로그인합니다.
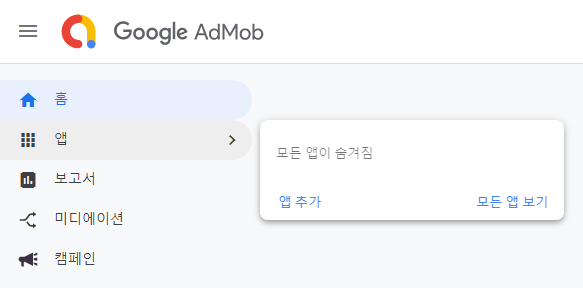
2. 왼쪽 메뉴에서 앱을 클릭하고 보이는 창에서 앱 추가를 클릭합니다.
3. 아니오를 선택합니다.

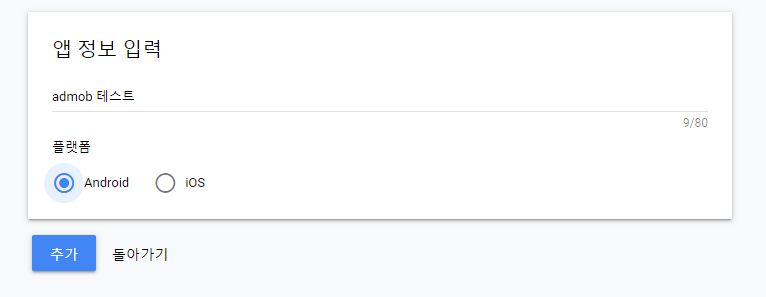
4. 앱 이름을 입력하고 플랫폼에서 Android를 선택 후, 추가 버튼을 클릭합니다.
5. 앱 ID가 발급되었습니다. 다음 단계를 클릭합니다.

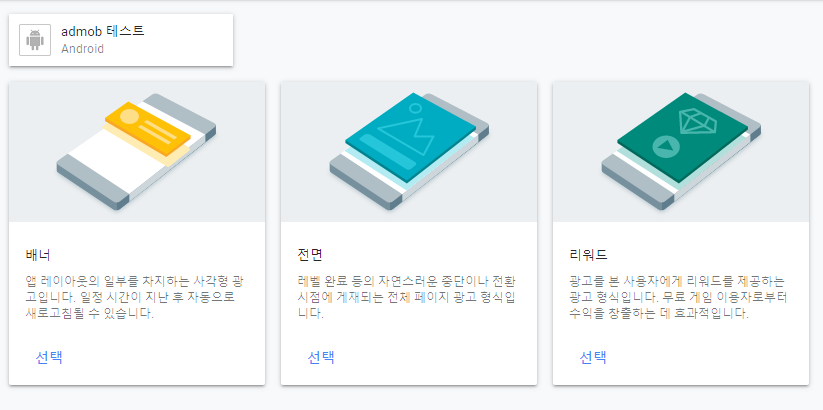
6. 앱에서 보여줄 광고 유형을 선택합니다. 본 포스트에서는 배너의 경우만 설명합니다. 배너에 있는 선택을 클릭합니다.
7. 광고 단위 이름을 적어주고 광고 단위 만들기를 클릭합니다.

8. 광고를 앱에 보여주기 위한 준비가 끝났습니다. 앱 ID와 광고 단위 ID를 따로 복사해두고 완료를 클릭합니다.

9. 이제 안드로이드 앱에 필요한 내용을 추가합니다.
strings.xml 파일에 앞에서 복사해두었던 앱 ID와 광고 단위 ID를 다음처럼 입력합니다.
banner_ad_unit_id_for_test는 광고가 제대로 보이는지 테스트하기 위해 사용합니다.
다른 형식의 테스트용 광고 ID가 필요하면 다음 링크를 참고하세요.
https://developers.google.com/admob/android/test-ads?hl=ko
예전과 달리 플레이스토어에 배포 된후에 광고가 보이기 때문이라고 합니다.
https://soulduse.tistory.com/78
<resources>
<string name="app_name">My Application</string>
<string name="admob_app_id">앱 ID</string>
<string name="banner_ad_unit_id">광고 단위 ID</string>
<string name="banner_ad_unit_id_for_test">ca-app-pub-3940256099942544/6300978111</string>
</resources>

..
..
10. 매니페스트 파일에 필요한 권한을 추가합니다.
<?xml version="1.0" encoding="utf-8"?>
<manifest xmlns:android="http://schemas.android.com/apk/res/android"
package="com.tistory.webnautes.myapplication">
<!-- 인터넷을 사용하기 위한 권한입니다. -->
<uses-permission android:name="android.permission.INTERNET"/>
<application
android:allowBackup="true"
android:icon="@mipmap/ic_launcher"
android:label="@string/app_name"
android:roundIcon="@mipmap/ic_launcher_round"
android:supportsRtl="true"
android:theme="@style/AppTheme">
<!-- play-services-ads 17.0.0 이상부터는 앱 ID를 입력해줘야 합니다 -->
<meta-data
android:name="com.google.android.gms.ads.APPLICATION_ID"
android:value="@string/admob_app_id"/>
<activity android:name=".MainActivity">
<intent-filter>
<action android:name="android.intent.action.MAIN" />
<category android:name="android.intent.category.LAUNCHER" />
</intent-filter>
</activity>
</application>
</manifest>
11. build.gradle 파일에 애드몹을 사용하기 위해 필요한 패키지를 추가합니다.
dependencies {
implementation fileTree(dir: 'libs', include: ['*.jar'])
implementation 'com.google.android.gms:play-services-ads:18.0.0'
추가후 Sync Now를 해주면 다음과 같은 에러가 발생합니다.
ERROR: Manifest merger failed : Attribute application@appComponentFactory value=(androidx.core.app.CoreComponentFactory) from [androidx.core:core:1.0.0] AndroidManifest.xml:22:18-86
is also present at [com.android.support:support-compat:28.0.0] AndroidManifest.xml:22:18-91 value=(android.support.v4.app.CoreComponentFactory).
Suggestion: add 'tools:replace="android:appComponentFactory"' to <application> element at AndroidManifest.xml:8:5-29:19 to override.
에러 메시지에 나온대로 application 태그에 다음 한줄을 추가한 후, 메뉴에서 File > Sync Project with Gradle Files를 선택했지만 해결이되지 않았습니다.
<application
tools:replace="android:appComponentFactory"
다시 추가한 줄을 삭제한 후, 메뉴에서 Refactor > Migrate to AndroidX를 선택하여 해결했습니다.
Migrate를 클릭합니다.

OK를 클릭합니다.

매니페스트 파일에 tools:replace..을 추가하는 것을 해보았다면 에러가 날 수 있습니다.
메뉴에서 File > Sync Project with Gradle Files를 선택후 다시 진행 해보세요.
12. 레이아웃 파일에 애드몹을 보여주기 위한 코드를 추가합니다.
광고가 보이는지 테스트하기 위해 ads:adUnitId의 값으로 테스트용 광고 ID인 banner_ad_unit_id_for_test를 사용하고 있습니다.
플레이스토어에 배포할 때에는 banner_ad_unit_id_for_test 대신에 banner_ad_unit_id를 사용하세요.
<?xml version="1.0" encoding="utf-8"?>
<RelativeLayout
xmlns:android="http://schemas.android.com/apk/res/android"
xmlns:tools="http://schemas.android.com/tools"
android:layout_width="match_parent"
android:layout_height="match_parent"
tools:context=".MainActivity">
<TextView
android:layout_width="match_parent"
android:layout_height="wrap_content"
android:layout_above="@+id/adView"
android:text="Hello World!" />
<com.google.android.gms.ads.AdView
xmlns:ads="http://schemas.android.com/apk/res-auto"
android:id="@+id/adView"
android:layout_width="wrap_content"
android:layout_height="wrap_content"
android:layout_centerHorizontal="true"
android:layout_alignParentBottom="true"
ads:adSize="BANNER"
ads:adUnitId="@string/banner_ad_unit_id_for_test">
</com.google.android.gms.ads.AdView>
</RelativeLayout>
코드 추가후 레이아웃 미리보기에서 광고가 다른 것에 가려지지 않는지 확인하세요.

13. 자바 코드에 애드몹 관련 코드를 추가합니다.
public class MainActivity extends AppCompatActivity {
private AdView mAdView;
@Override
protected void onCreate(Bundle savedInstanceState) {
super.onCreate(savedInstanceState);
setContentView(R.layout.activity_main);
MobileAds.initialize(this, getString(R.string.admob_app_id));
mAdView = findViewById(R.id.adView);
AdRequest adRequest = new AdRequest.Builder().build();
mAdView.loadAd(adRequest);
// 광고가 제대로 로드 되는지 테스트 하기 위한 코드입니다.
mAdView.setAdListener(new AdListener() {
@Override
public void onAdLoaded() {
// Code to be executed when an ad finishes loading.
// 광고가 문제 없이 로드시 출력됩니다.
Log.d("@@@", "onAdLoaded");
}
@Override
public void onAdFailedToLoad(int errorCode) {
// Code to be executed when an ad request fails.
// 광고 로드에 문제가 있을시 출력됩니다.
Log.d("@@@", "onAdFailedToLoad " + errorCode);
}
@Override
public void onAdOpened() {
// Code to be executed when an ad opens an overlay that
// covers the screen.
}
@Override
public void onAdClicked() {
// Code to be executed when the user clicks on an ad.
}
@Override
public void onAdLeftApplication() {
// Code to be executed when the user has left the app.
}
@Override
public void onAdClosed() {
// Code to be executed when the user is about to return
// to the app after tapping on an ad.
}
});
14. 다음처럼 테스트용 광고가 하단에 출력됩니다.

참고
https://developers.google.com/admob/android/quick-start?hl=ko
https://developers.google.com/admob/android/banner?hl=ko
'Android > 개념 및 예제' 카테고리의 다른 글
시간날때마다 틈틈이 이것저것 해보며 블로그에 글을 남깁니다.
블로그의 문서는 종종 최신 버전으로 업데이트됩니다.
여유 시간이 날때 진행하는 거라 언제 진행될지는 알 수 없습니다.
블로그 글과 유튜브 영상을 만드는 것은 전문가라서라기보단 공부한 내용을 함께 공유하는 게 좋아서입니다.
제가 쓴 책도 한번 검토해보세요 ^^


