칼만 필터를 사용하여 파란색 원을 추적하는 간단한 테스트OpenCV/OpenCV 강좌2025. 2. 12. 22:53
Table of Contents
반응형
파란색 원이 원형 궤적을 그리다가 멈추는 경우, 칼만 필터의 추정 궤적이 어떻게 그려지는지 궁금해서 코드를 작성했습니다.
파란색 원이 원형을 그리며 이동하면 칼만 필터는 이를 빨간색 궤적으로 추정합니다. 스페이스바를 누르면 파란색 원이 순간적으로 멈추게 되고, 이때 칼만 필터의 추정 궤적은 직선 방향으로 이동하게 됩니다. q를 누르면 프로그램이 종료됩니다.
실행 결과는 아래 유튜브에 있습니다.
전체 코드입니다.
| import cv2 import numpy as np from collections import deque # 전역 변수 설정 WIDTH = 640 HEIGHT = 480 is_paused = False # 칼만 필터 초기화 kalman = cv2.KalmanFilter(4, 2) kalman.measurementMatrix = np.array([[1, 0, 0, 0], [0, 1, 0, 0]], np.float32) kalman.transitionMatrix = np.array([[1, 0, 1, 0], [0, 1, 0, 1], [0, 0, 1, 0], [0, 0, 0, 1]], np.float32) # 프로세스 노이즈를 낮춰서 예측이 더 멀리 진행되도록 설정 kalman.processNoiseCov = np.array([[1,0,0,0], [0,1,0,0], [0,0,1,0], [0,0,0,1]], np.float32) * 0.001 # 측정 노이즈를 낮춰서 측정값을 더 신뢰하도록 설정 kalman.measurementNoiseCov = np.array([[1,0], [0,1]], np.float32) * 0.1 # 궤적 저장용 큐 TRAIL_LENGTH = 50 measured_points = deque(maxlen=TRAIL_LENGTH) predicted_points = deque(maxlen=TRAIL_LENGTH) # 윈도우 생성 cv2.namedWindow("Kalman Filter Tracking") # 원형 운동 변수 t = 0 center_x, center_y = WIDTH//2, HEIGHT//2 radius = 100 angular_velocity = 0.05 # 이전 위치 저장 변수 (속도 계산용) last_x, last_y = None, None while True: frame = np.zeros((HEIGHT, WIDTH, 3), dtype=np.uint8) # 원형 운동 위치 계산 if not is_paused: t += angular_velocity current_x = int(center_x + radius * np.cos(t)) current_y = int(center_y + radius * np.sin(t)) # 칼만 필터 예측 prediction = kalman.predict() pred_point = (int(prediction[0]), int(prediction[1])) # 측정값 업데이트 measurement = np.array([[np.float32(current_x)], [np.float32(current_y)]]) # 정지 상태일 때는 속도 성분을 유지 if not is_paused: kalman.correct(measurement) if last_x is not None and last_y is not None: # 현재 속도 계산 및 상태 벡터 업데이트 dx = current_x - last_x dy = current_y - last_y state = kalman.statePost state[2] = dx # x 방향 속도 state[3] = dy # y 방향 속도 kalman.statePost = state # 현재 위치 저장 last_x, last_y = current_x, current_y # 파란색 원 그리기 cv2.circle(frame, (current_x, current_y), 20, (255, 0, 0), -1) center = (current_x, current_y) # 궤적 저장 measured_points.append(center) predicted_points.append(pred_point) # 예측 궤적 그리기 (빨간색) points = list(predicted_points) for i in range(1, len(points)): if points[i-1] is not None and points[i] is not None: thickness = 2 if not is_paused else 3 cv2.line(frame, points[i-1], points[i], (0, 0, 255), thickness) # 측정 궤적 그리기 (파란색) points = list(measured_points) for i in range(1, len(points)): if points[i-1] is not None and points[i] is not None: cv2.line(frame, points[i-1], points[i], (255, 0, 0), 2) # 현재 예측 위치 표시 pred_radius = 5 if not is_paused else 8 cv2.circle(frame, pred_point, pred_radius, (0, 0, 255), -1) # 일시정지 상태 표시 if is_paused: cv2.putText(frame, "PAUSED", (10, 30), cv2.FONT_HERSHEY_SIMPLEX, 1, (255, 255, 255), 2) cv2.imshow("Kalman Filter Tracking", frame) key = cv2.waitKey(30) & 0xFF if key == ord('q'): break elif key == ord(' '): is_paused = not is_paused cv2.destroyAllWindows() |
반응형
'OpenCV > OpenCV 강좌' 카테고리의 다른 글
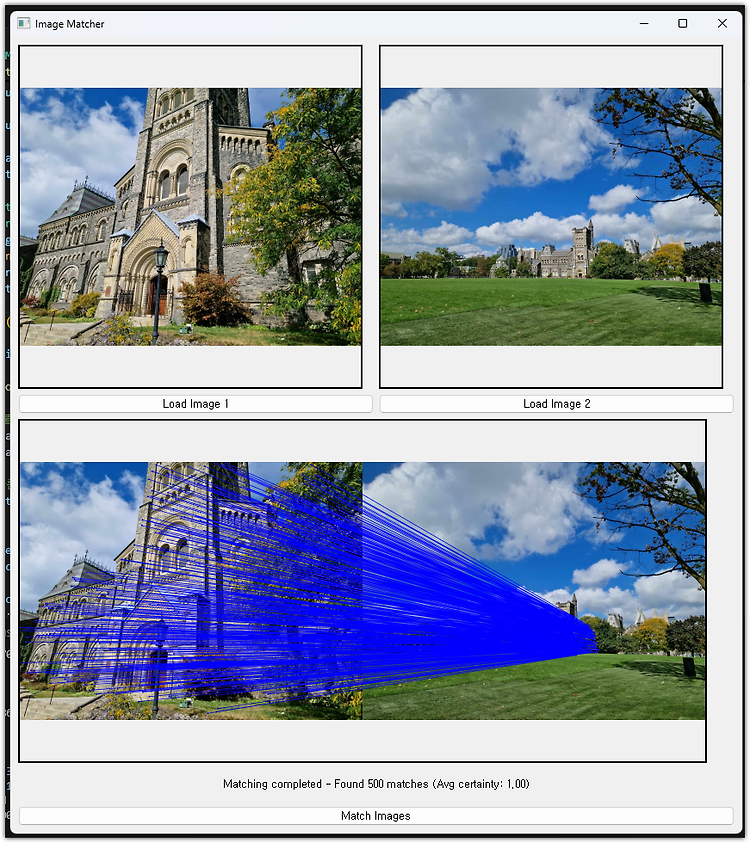
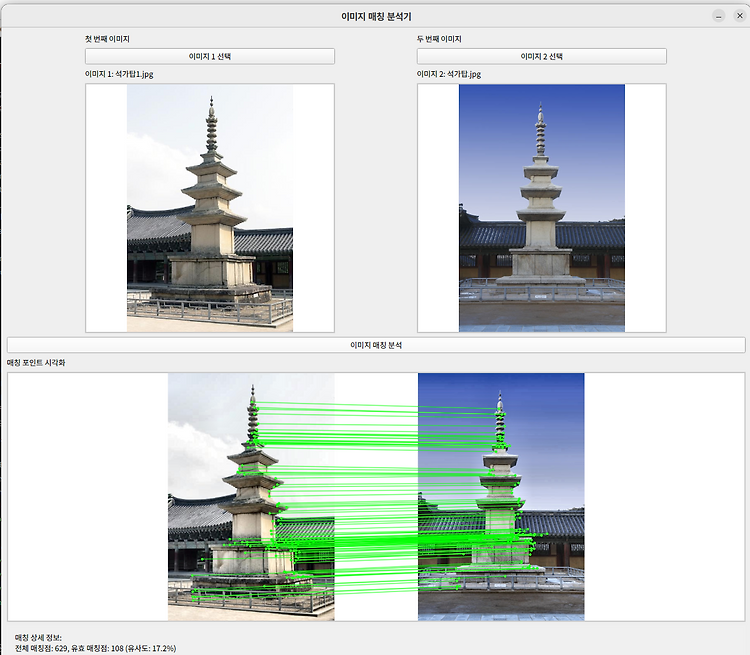
| RoMa를 사용하여 이미지 매칭해보기 (0) | 2025.02.20 |
|---|---|
| 칼만 필터를 사용하여 아치형 트랙 위를 반복적으로 굴러가는 파란색 공을 추적하는 간단한 테스트 (0) | 2025.02.14 |
| YoLo를 사용하여 영상에 사람이 있었던 총시간을 측정하는 OpenCV Python 예제 (1) | 2025.01.28 |
| OpenCV와 XFeat를 사용한 pyQt5 이미지 매칭 프로그램 (0) | 2025.01.02 |
| XFeat를 사용한 월리를 찾기 구현 (0) | 2024.12.17 |
시간날때마다 틈틈이 이것저것 해보며 블로그에 글을 남깁니다.
블로그의 문서는 종종 최신 버전으로 업데이트됩니다.
여유 시간이 날때 진행하는 거라 언제 진행될지는 알 수 없습니다.
영화,책, 생각등을 올리는 블로그도 운영하고 있습니다.
https://freewriting2024.tistory.com
제가 쓴 책도 한번 검토해보세요 ^^