

Apple Silicon Macbook에 PyTorch를 설치하는 과정을 다루고 있습니다.
글 작성을 위한 테스트는 Macbook M1에서 진행했습니다.
다음 링크를 참고하여 작성했습니다.
https://betterprogramming.pub/how-to-install-pytorch-on-apple-m1-series-512b3ad9bc6
https://pnote.eu/notes/pytorch-mac-setup/
2021. 5. 2. 최초작성
2024. 3. 9 제목 변경
0. 다음 포스트를 참고하여 Xcode를 설치합니다.
MacBook M1에 Xcode 설치하기
https://webnautes.tistory.com/2024
1. 다음 포스트대로 Macbook에 Miniforge를 설치하여 Python 개발환경을 만든 후, Visual Studio Code와 연동하는 작업까지 진행합니다.
Miniforge는 Anaconda, Miniconda처럼 Python 가상 환경을 만들어 주는 역할을 하는 것입니다.
Apple Silicon Macbook에 Miniforge 설치하여 Visual Studio Code와 연동하기
https://webnautes.tistory.com/2101
2. Command + 스페이스바를 누른 후, terminal.app를 입력하고 엔터를 눌러 터미널을 실행합니다.
PyTorch를 설치하여 사용할 Python 가상환경을 생성합니다. 여기에선 Python 3.11를 사용하도록 했습니다.
conda create -n pytorch python=3.11
3. 가상환경을 활성화 합니다.
conda activate pytorch
4. PyTorch를 설치합니다.
아래 링크에서 다음처럼 선택하면 PyTorch 설치시 필요한 명령을 알려줍니다.
https://pytorch.org/get-started/locally/

위에서 확인한 명령을 사용하여 설치를 진행합니다.
pip3 install torch torchvision torchaudio
5. 터미널에서 다음 명령들을 입력하여 설치된 PyTorch를 확인해봅니다.
(pytorch) webnautes@webnautesui-MacBookAir ~ % python3
Python 3.11.8 | packaged by conda-forge | (main, Feb 16 2024, 20:49:36) [Clang 16.0.6 ] on darwin
Type "help", "copyright", "credits" or "license" for more information.
>>> import torch
>>> torch.__version__
'2.2.1'
위 스크린샷과 버전이 동일하지 않으면 pip3로 설치한 것과 다른 파이썬을 실행한것입니다.
>>> torch.backends.mps.is_available()
True
>>> torch.backends.mps.is_built()
True
두개 모두 True가 표시되야 MPS 벡엔드를 사용할 수 있는 상태입니다.
>>> quit()
(pytorch) webnautes@webnautesui-MacBookAir ~ %
6. Visual Studio Code에서 간단한 PyTorch 코드를 실행해봅니다.
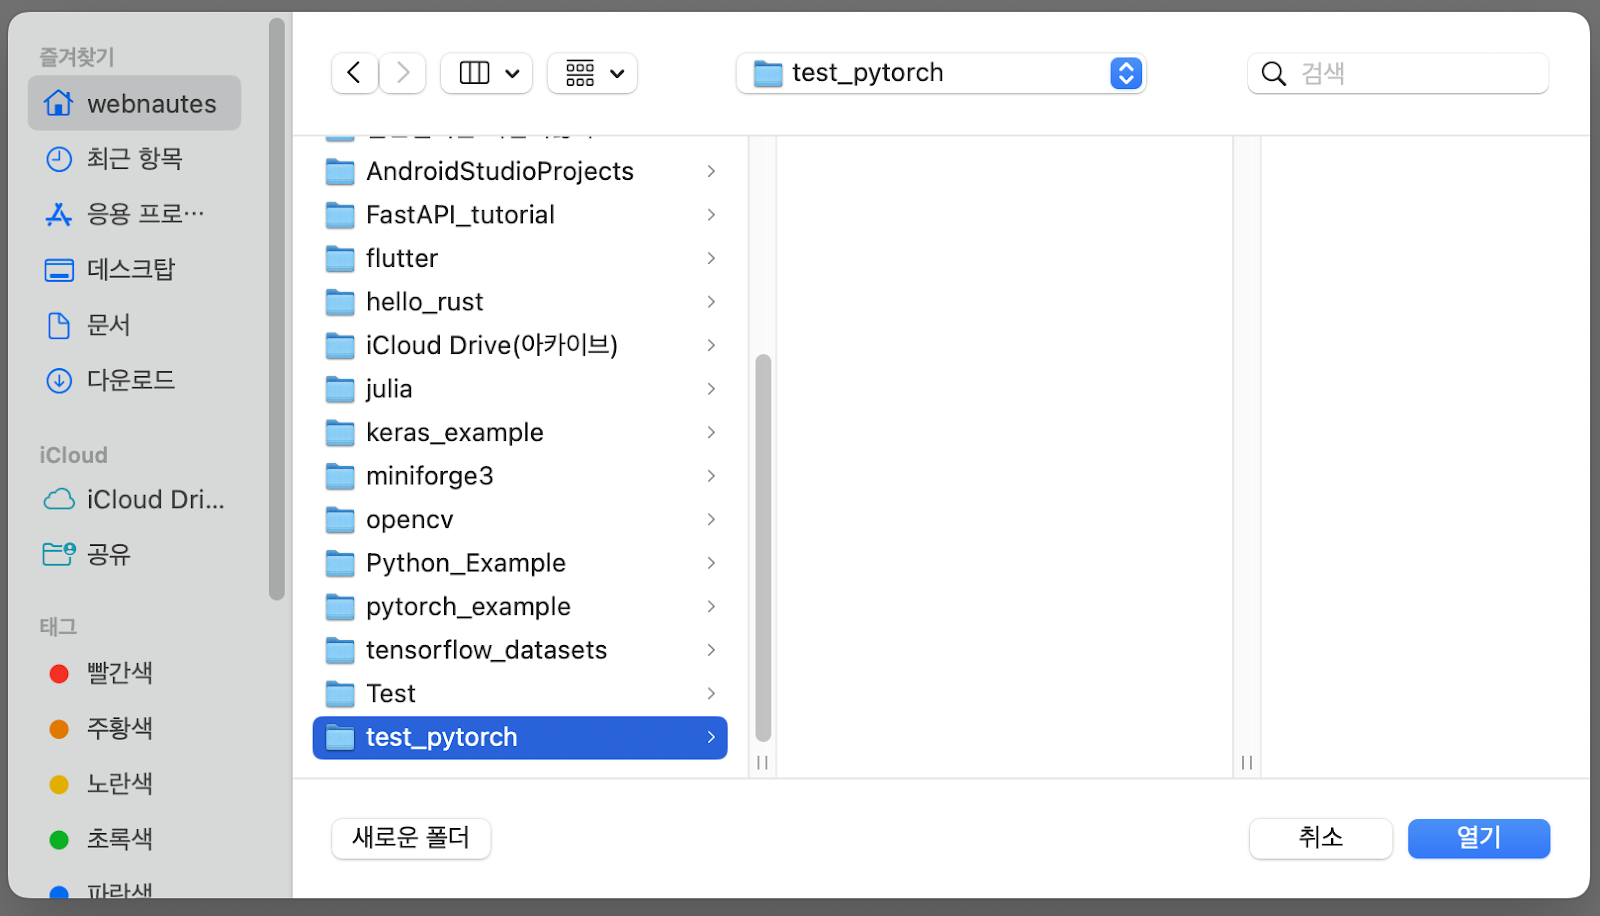
Visual Studio Code에서 새로운 폴더를 열기위해 Open Folder를 선택합니다.

왼쪽 아래 보이는 새로운 폴더를 선택하여 test_pytorch 폴더를 생성한후, 열기를 클릭합니다.
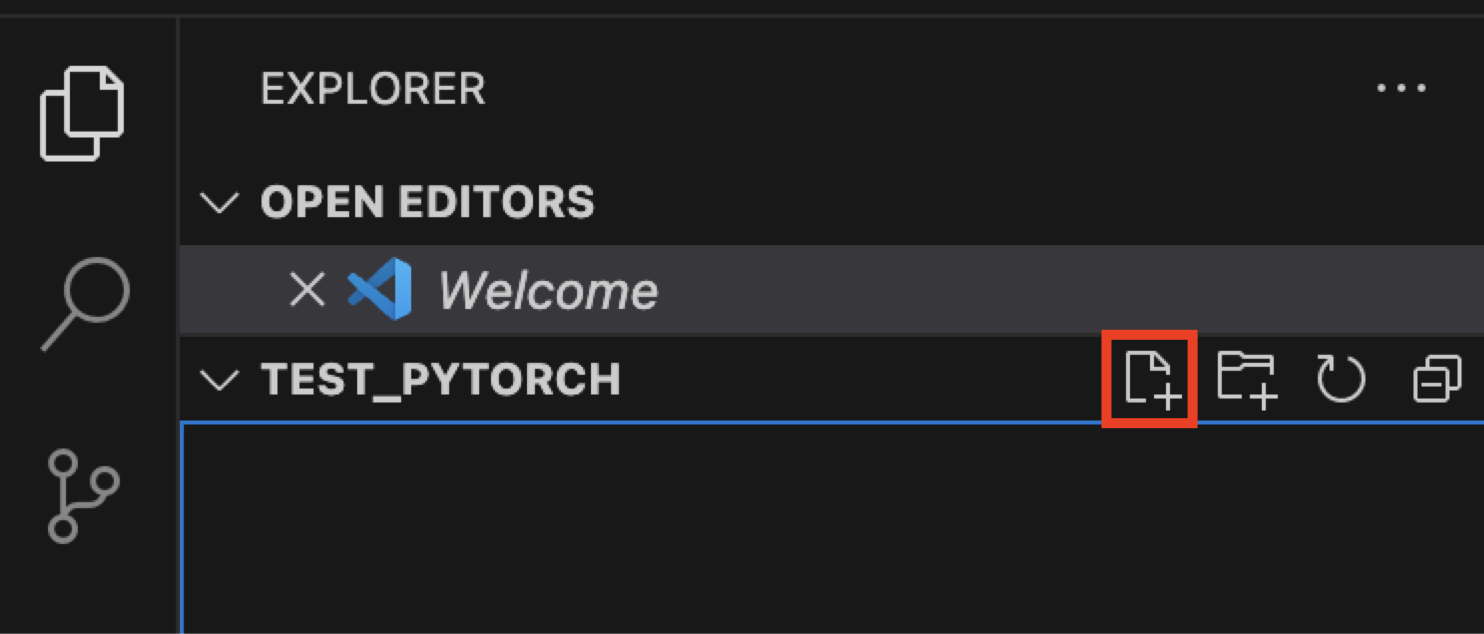
폴더 이름에 마우스 커서를 가져가면 보이는 New File 아이콘클릭하고 test.py 파일을 추가합니다.
다음 코드를 test.py 파일에 추가합니다. ( 출처 https://pytorch.org/tutorials/beginner/pytorch_with_examples.html )
| # -*- coding: utf-8 -*- import numpy as np import math # Create random input and output data x = np.linspace(-math.pi, math.pi, 2000) y = np.sin(x) # Randomly initialize weights a = np.random.randn() b = np.random.randn() c = np.random.randn() d = np.random.randn() learning_rate = 1e-6 for t in range(2000): # Forward pass: compute predicted y # y = a + b x + c x^2 + d x^3 y_pred = a + b * x + c * x ** 2 + d * x ** 3 # Compute and print loss loss = np.square(y_pred - y).sum() if t % 100 == 99: print(t, loss) # Backprop to compute gradients of a, b, c, d with respect to loss grad_y_pred = 2.0 * (y_pred - y) grad_a = grad_y_pred.sum() grad_b = (grad_y_pred * x).sum() grad_c = (grad_y_pred * x ** 2).sum() grad_d = (grad_y_pred * x ** 3).sum() # Update weights a -= learning_rate * grad_a b -= learning_rate * grad_b c -= learning_rate * grad_c d -= learning_rate * grad_d print(f'Result: y = {a} + {b} x + {c} x^2 + {d} x^3') |
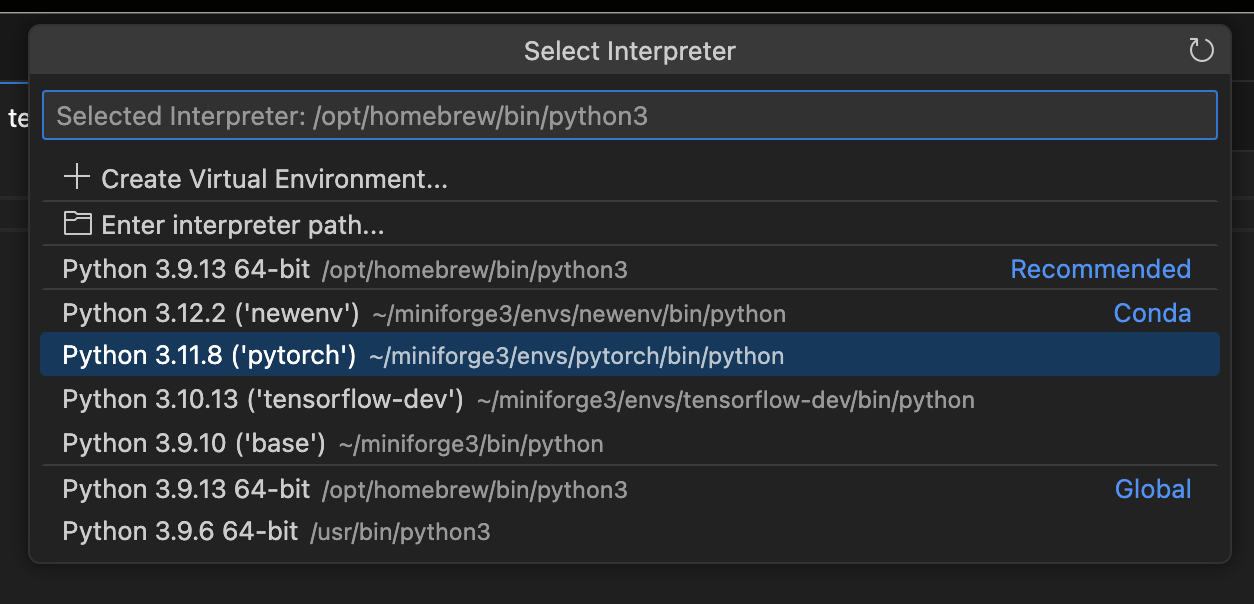
command + shift + p를 누른 후, 메뉴에서 Select Interpreter를 선택합니다. 보이지 않으면 입력란에 입력하세요.

앞에서 만든 가상환경 pytorch를 선택합니다.
test.py에 열린 편집기에서 마우스 우클릭하며 보이는 메뉴에서 Run Python > Run Python File in Terminal을 선택합니다.
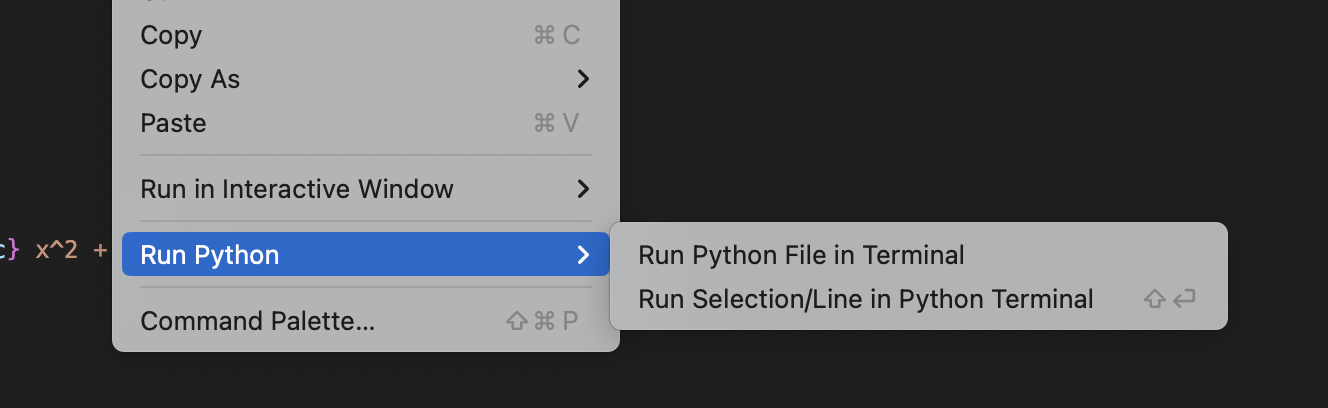
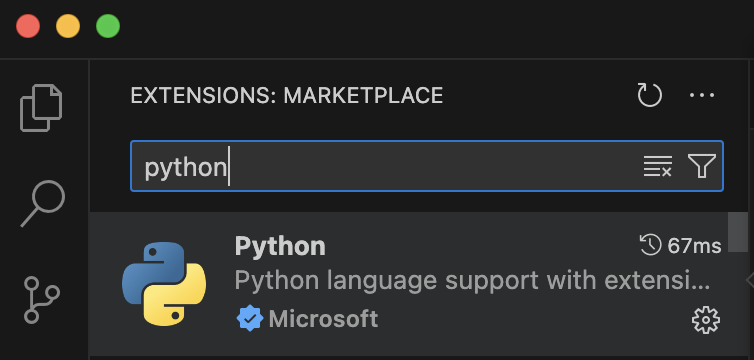
위 메뉴가 보이지 않는 다면 왼쪽에서 shift + command + x를 누른 후, python을 검색하여 Python 항목에 보이는 파란색 install 버튼을 클릭하여 설치하세요.
화면 아래쪽에 터미널이 보이면서 다음처럼 실행결과가 보입니다ㅏ.
(pytorch) (base) webnautes@webnautesui-MacBookAir test_pytorch % /Users/webnautes/miniforge3/envs/pytorch/bin/python /Users/webnautes/test_pytorch/test.py
99 2409.263481336157
199 1615.1053849730456
299 1084.4202368787744
399 729.5740711924819
499 492.15053964079385
599 333.1858920777797
699 226.67762060192987
799 155.26333829979245
899 107.34311965634551
999 75.16227000955999
1099 53.53338215786795
1199 38.98409616466592
1299 29.188460353661252
1399 22.58731316102883
1499 18.134709123514924
1599 15.128437482058892
1699 13.096674885956531
1799 11.722130310734878
1899 10.79124603827793
1999 10.160154015878463
Result: y = 0.025355170476086118 + 0.8297807535855228 x + -0.004374188818982731 x^2 + -0.08949555108141843 x^3
Fashion MNIST 데이터셋을 학습하는 PyTorch 예제 코드를 다루고 있는 다음 포스트도 확인해보세요.
간단한 Pytorch 예제 설명
https://webnautes.tistory.com/2074
'Deep Learning & Machine Learning > Tensorflow&PyTorch 개발환경' 카테고리의 다른 글
| Ubuntu 22.04에 CUDA 사용하도록 Tensorflow 설치하는 방법 (8) | 2024.03.14 |
|---|---|
| Ubuntu / Windows / WSL2 / Apple Silicon Macbook에서 Tensorflow / Pytorch 설치하는 방법 (0) | 2024.03.09 |
| Apple Silicon Macbook에서 Tensorflow 설치하기 (0) | 2024.03.02 |
| Windows에서 CUDA를 사용하도록 PyTorch 1.8 설치하는 방법 (0) | 2024.01.07 |
| Windows에 CUDA Toolkit 11.8 cuDNN 8.7.0 Tensorflow 설치하는 방법 (4) | 2024.01.06 |
시간날때마다 틈틈이 이것저것 해보며 블로그에 글을 남깁니다.
블로그의 문서는 종종 최신 버전으로 업데이트됩니다.
여유 시간이 날때 진행하는 거라 언제 진행될지는 알 수 없습니다.
블로그 글과 유튜브 영상을 만드는 것은 전문가라서라기보단 공부한 내용을 함께 공유하는 게 좋아서입니다.
제가 쓴 책도 한번 검토해보세요 ^^


