
OpenCV에서 cudacodec 사용하도록 빌드하는 방법을 다룹니다.
2022. 12. 18 최초작성
OpenCV를 빌드하는 하는 방법은 아래 포스트를 참고하세요. 본 포스트에서는 추가로 작업해야 하는 부분만 소개합니다.
Ubuntu 22.04에 CUDA 사용하는 OpenCV 설치하는 방법
https://webnautes.tistory.com/1876
위 포스트대로 CUDA를 사용하도록 OpenCV를 빌드하려고 해도 디폴트로 cudacodec가 비활성화 되어있기 때문에 cudacodec 사용시 throw_no_cuda 에러가 발생합니다.
왜냐하면 필요한 nvcuvid 모듈을 사용하려면 NVIDIA Video Codec SDK가 필요하기 때문입니다.
self.video = cv2.cudacodec.createVideoReader(self.url)
cv2.error: OpenCV(4.6.0) /home/webnautes/opencv-sources/opencv-4.6.0/modules/core/include/opencv2/core/private.cuda.hpp:112: error: (-213:The function/feature is not implemented) The called functionality is disabled for current build or platform in function 'throw_no_cuda'
아래 링크를 보고 진행하여 해결이 되었습니다.
https://stackoverflow.com/questions/65740367/reading-a-video-on-gpu-using-c-and-cuda
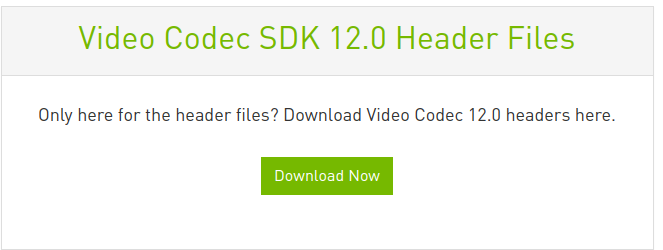
아래 링크에서 NVIDIA Video Codec SDK를 다운로드 받았습니다. 글 작성 시점에서는 Video Codec SDK 12.0 Header Files 12.0을 다운로드 할 수 있습니다.
https://developer.nvidia.com/nvidia-video-codec-sdk

다운받은 파일을 압축을 풀면 보이는 /Interface 아래에 있는 nvcuvid.h, cuviddec.h, nvEncodeAPI.h 파일들을 /usr/local/cuda-11.8/targets/x86_64-linux/include에 복사해줍니다.
webnautes@webnautes-laptop:~$ cd 다운로드
webnautes@webnautes-laptop:~/다운로드$ unzip Video_Codec_Interface_12.0.16.zip
Archive: Video_Codec_Interface_12.0.16.zip
creating: Video_Codec_Interface_12.0.16/
creating: Video_Codec_Interface_12.0.16/Interface/
inflating: Video_Codec_Interface_12.0.16/Interface/cuviddec.h
inflating: Video_Codec_Interface_12.0.16/Interface/nvcuvid.h
inflating: Video_Codec_Interface_12.0.16/Interface/nvEncodeAPI.h
inflating: Video_Codec_Interface_12.0.16/ReadMe.pdf
webnautes@webnautes-laptop:~/다운로드$ cp Video_Codec_Interface_12.0.16/Interface/*.h /usr/local/cuda-11.8/targets/x86_64-linux/include/
위에서 언급한 포스트대로 진행하대 아래 두개의 옵션을 cmake 사용시 추가하여 OpenCV를 빌드합니다.
-D WITH_NVCUVID=ON -D BUILD_opencv_cudacodec=ON
cmake 실행결과 다음처럼 NVCUVID가 활성화 되었는지 확인하세요. NVCUVID 문자열이 보여야 합니다.

cudacodec를 사용하는 Python 예제입니다. RTSP_URL는 테스트에 사용할 RTSP 주소로 바꾸세요.
| import cv2 reader = cv2.cudacodec.createVideoReader(RTSP_URL) # read a frame to ensure that the decoder has been called and format_info will be valid ret, frame_bgra = reader.nextFrame() if ret: frame_bgr = cv2.cuda.cvtColor(frame_bgra,cv2.COLOR_BGRA2BGR) frame_host = frame_bgr.download() print(type(frame_host), frame_host.shape) cv2.imshow('test', frame_host) cv2.waitKey(0) |
'OpenCV > OpenCV 강좌' 카테고리의 다른 글
| OpenCV Python 강좌 – 이미지 이동 / 회전 하기 (0) | 2023.10.12 |
|---|---|
| OpenCV Python 강좌 – 이미지 확대/축소 resize 함수 (0) | 2023.10.12 |
| OpenCV Python – Super Resolution 예제 (0) | 2023.10.11 |
| 동영상 파일을 RTSP 스트리밍하기 (0) | 2023.10.10 |
| fps 표시 및 동영상 파일 저장하며 webcam 영상 보여주는 OpenCV C++ 예제 코드 (0) | 2023.10.10 |


