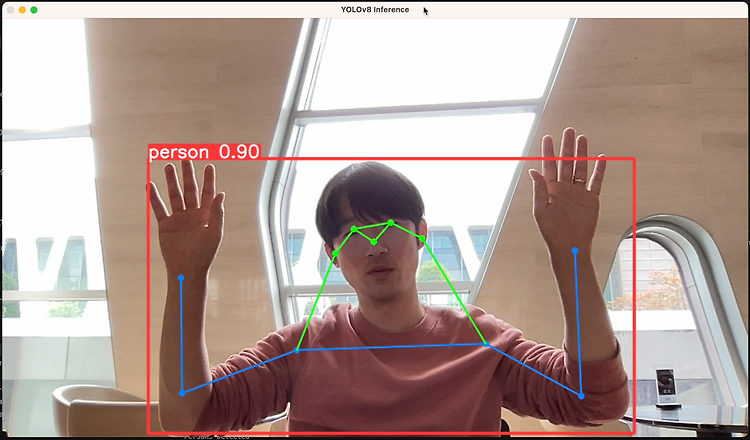

웹캠 영상을 입력으로 하여 Yolo v8 pose를 실행해봅니다.

최초작성 2023. 10. 03
관련 포스트
Yolo v8 사용해보기
https://webnautes.tistory.com/1851
다음 포스트를 참고하여 파이썬 개발 환경을 만드는 것을 권장합니다.
Visual Studio Code와 Miniconda를 사용한 Python 개발 환경 만들기( Windows, Ubuntu)
https://webnautes.tistory.com/1842
좀 더 빠르게 욜로를 실행시키려면 CUDA를 사용하도록 Pytorch를 설치해야 합니다.
( https://qiita.com/kotai2003/items/32329a90703394d39d5c )
Ubuntu 22.04에 CUDA 사용할 수 있도록 PyTorch 2.0 설치하는 방법
https://webnautes.tistory.com/1845
WSL2에서 CUDA 사용할 수 있도록 PyTorch 2.0 설치하는 방법
https://webnautes.tistory.com/1849
Windows에 CUDA Toolkit 11.8 cuDNN 8.7.0 PyTorch 설치하는 방법
https://webnautes.tistory.com/1850
욜로 테스트 코드를 실행할 가상환경을 생성합니다. Python 3.11을 사용하도록 생성했습니다.
(base) C:\Users\webnautes>conda create -n yolov8 python=3.11
가상환경을 활성화합니다.
(base) C:\Users\webnautes>conda activate yolov8
필요한 패키지를 설치합니다.
(yolov8) C:\Users\webnautes>pip install opencv-python ultralytics
다음 코드를 test_yolov8_pose.py 이름으로 저장합니다. 여기서부터는 Visual Studio Code에서 진행하면 편합니다.
| import cv2 import time from ultralytics import YOLO print('Starting...') model = YOLO('yolov8n-pose.pt') # 동영상 파일 사용시 video_path = 'test.mp4' cap = cv2.VideoCapture(video_path) # webcam 사용시 # cap = cv2.VideoCapture(0) start_time = time.time() frame_count = 0 results = None count = 0 while cap.isOpened(): # Read a frame from the video success, frame = cap.read() count = count + 1 if success: # Resize the image to the desired size using cv2.resize() # frame = cv2.resize(frame, (width, height)) # Check if one second has passed since the last inference was applied if time.time() - start_time >= 0.5: # Run YOLOv8 inference on the frame results = model(frame) # Update the timer and frame counter start_time = time.time() #frame_count += 2 # Visualize the results on the frame if they exist if results is not None: annotated_frame = results[0].plot() # Display the annotated frame cv2.imshow("YOLOv8 Inference", annotated_frame) P = 0 try: # print keypoints index number and x,y coordinates for idx, kpt in enumerate(results[0].keypoints[0]): print('Persons Detected') P = 1 except: print('No Persons') P = 0 # Break the loop if 'q' is pressed if cv2.waitKey(1) & 0xFF == ord("q"): break else: # Break the loop if the end of the video is reached break cap.release() cv2.destroyAllWindows() |
코드에서는 욜로 모델로 yolov8n-pose.pt를 사용하고 있습니다.
아래 표의 Model 열에 있는 모델 이름 중 아래쪽에 있는 걸 적을 수록 물체 검출 정확도가 올라가는 대신 검출하는데 걸리는 시간이 좀 더 걸립니다. 코드에서 yolov8s-pose.pt 자리에 다른 모델 이름을 적어주면 됩니다.

참고
https://docs.ultralytics.com/modes/predict/#streaming-source-for-loop
https://github.com/ultralytics/ultralytics
'Deep Learning & Machine Learning > YOLO' 카테고리의 다른 글
| YOLO v4 실행시키는 방법 (0) | 2023.10.21 |
|---|---|
| Ubuntu에서 darknet을 사용하여 Yolo v4 커스텀 학습하는 방법 (0) | 2023.10.08 |
| YOLO v8 사용해보기 (0) | 2023.10.04 |


