이번 포스팅에서는 REST 요청 결과 받은 JSON 데이터를 파싱하여 리스트뷰에 출력하는 과정을 설명하고 있습니다.
http://webnautes.tistory.com/459
http://webnautes.tistory.com/462
http://webnautes.tistory.com/471
http://webnautes.tistory.com/472
최초 작성 - 2014.07.1
최종 업데이트 - 2017.12.22
1. 실행 과정
2. 소스코드 설명
3. 전체 소스 코드
|
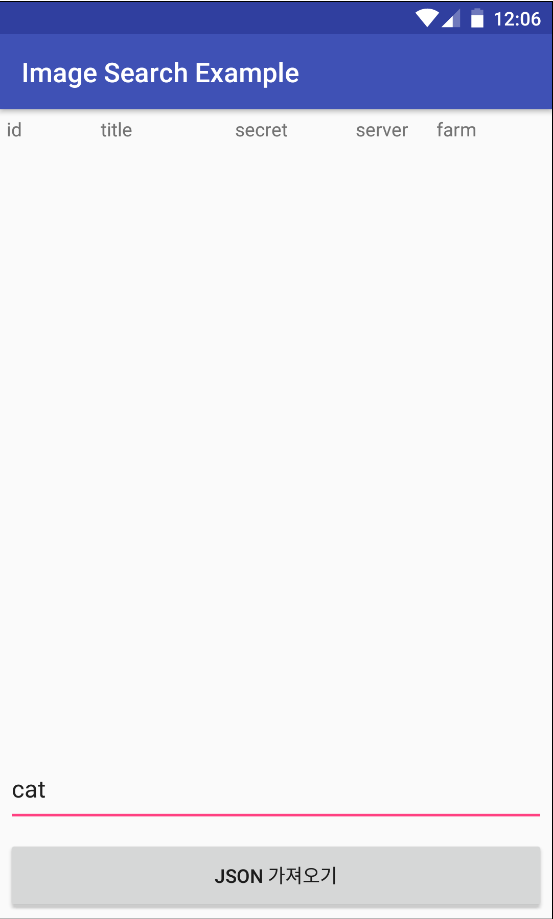
1. 실행 과정
1. 이미지 검색할 단어로 cat을 입력하고 버튼을 클릭하면
2. 내부적으로 REST 요청 URL을 다음처럼 생성하여 서버에 GET방식으로 데이터를 요청합니다.
https://secure.flickr.com/services/rest/?method=flickr.photos.search&api_key=b901381d5d56065a36032436ff20243a&per_page=50&sort=interestingness-desc&format=json&content_type=1&text=cat
3. JSON 포맷으로 응답 데이터가 다음처럼 넘어옵니다.

4. JSON 포맷 데이터를 파싱하여 리스트뷰에 보여줍니다.
다시 검색할 단어를 바꾸고 버튼을 클릭하면 리스트뷰를 검색결과로 바꿔서 출력해줍니다.

2. 소스코드 설명
1. 버튼을 클릭하면 EditText에서 사용자가 입력한 문자열을 읽어오고 getJSON 메소드를 호출합니다.
@Override
protected void onCreate(Bundle savedInstanceState) {
. . . . . . . . . . . . . . . . . . . . . . . . . . . . . . .
buttonRequestJSON.setOnClickListener(new View.OnClickListener() {
@Override
public void onClick(View v) {
progressDialog = new ProgressDialog( MainActivity.this );
progressDialog.setMessage("Please wait.....");
progressDialog.show();
String keyword = searchKeyword.getText().toString();
getJSON(keyword);
}
});
} |
2. 두번째 포스팅에서 설명했던 REST 요청 결과인 JSON 포맷의 데이터가 result 스트링 변수에 저장되어 있습니다.
result 스트링 변수에 저장된 JSON 포맷의 데이터를 jsonParser 메소드에서 처리 후, 리스트에 넣어주게 됩니다.
public void getJSON(final String keyword) {
if ( keyword == null) return;
Thread thread = new Thread(new Runnable() {
public void run() {
. . . . . . . . . . . . . . . . . . .
if (jsonParser(result)){
.. . . . . . . . . . . . . . . . .
}
}
});
thread.start();
} |
3. jsonParser 메소드에서 파싱하는 과정을 설명하겠습니다.
우선 JSON 데이터 구조와 관련 없는 맨 앞에 있는 "jsonFlickrApi("와 맨 뒤에 있는 ")"를 제거해줍니다.
설명 편의상 페이지당 이미지 갯수를 5개로 제한했습니다.
jsonFlickrApi({"photos":{"page":1,"pages":572438,"perpage":5,"total":"2862187", "photo":[{"id":"15867520885","owner":"119678691@N02","secret":"69d04f6ecc","server":"7560","farm":8,"title":"Cat","ispublic":1,"isfriend":0,"isfamily":0} ,{"id":"32708232492","owner":"34505155@N05","secret":"d88434c4fa","server":"727","farm":1,"title":"Cat In Black","ispublic":1,"isfriend":0,"isfamily":0} ,{"id":"34055408873","owner":"95020224@N03","secret":"5ba1c27a46","server":"4200","farm":5,"title":"cat","ispublic":1,"isfriend":0,"isfamily":0} ,{"id":"34493121303","owner":"95020224@N03","secret":"52fe2ee5da","server":"4236","farm":5,"title":"cat","ispublic":1,"isfriend":0,"isfamily":0} ,{"id":"35127972471","owner":"95020224@N03","secret":"6730c1a382","server":"4225","farm":5,"title":"cat","ispublic":1,"isfriend":0,"isfamily":0}]},"stat":"ok"}) |
jsonString = jsonString.replace("jsonFlickrApi(", "");
jsonString = jsonString.replace(")", ""); |
4. 이제 두 개의 키:값으로 이루어진 JSONObject입니다. photos 키의 값인 JSONObject를 가져와야 합니다.
{"photos":{"page":1,"pages":572438,"perpage":5,"total":"2862187", "photo":[{"id":"15867520885","owner":"119678691@N02","secret":"69d04f6ecc","server":"7560","farm":8,"title":"Cat","ispublic":1,"isfriend":0,"isfamily":0} ,{"id":"32708232492","owner":"34505155@N05","secret":"d88434c4fa","server":"727","farm":1,"title":"Cat In Black","ispublic":1,"isfriend":0,"isfamily":0} ,{"id":"34055408873","owner":"95020224@N03","secret":"5ba1c27a46","server":"4200","farm":5,"title":"cat","ispublic":1,"isfriend":0,"isfamily":0} ,{"id":"34493121303","owner":"95020224@N03","secret":"52fe2ee5da","server":"4236","farm":5,"title":"cat","ispublic":1,"isfriend":0,"isfamily":0} ,{"id":"35127972471","owner":"95020224@N03","secret":"6730c1a382","server":"4225","farm":5,"title":"cat","ispublic":1,"isfriend":0,"isfamily":0}]},"stat":"ok"} |
JSONObject jsonObject = new JSONObject(jsonString);
JSONObject photos = jsonObject.getJSONObject("photos"); |
5. JSONObject로부터 사진 정보가 들어있는 photo 키의 값인 JSONArray를 가져올 차례입니다.
{"page":1,"pages":572438,"perpage":5,"total":"2862187", "photo":[{"id":"15867520885","owner":"119678691@N02","secret":"69d04f6ecc","server":"7560","farm":8,"title":"Cat","ispublic":1,"isfriend":0,"isfamily":0} ,{"id":"32708232492","owner":"34505155@N05","secret":"d88434c4fa","server":"727","farm":1,"title":"Cat In Black","ispublic":1,"isfriend":0,"isfamily":0} ,{"id":"34055408873","owner":"95020224@N03","secret":"5ba1c27a46","server":"4200","farm":5,"title":"cat","ispublic":1,"isfriend":0,"isfamily":0} ,{"id":"34493121303","owner":"95020224@N03","secret":"52fe2ee5da","server":"4236","farm":5,"title":"cat","ispublic":1,"isfriend":0,"isfamily":0} ,{"id":"35127972471","owner":"95020224@N03","secret":"6730c1a382","server":"4225","farm":5,"title":"cat","ispublic":1,"isfriend":0,"isfamily":0}]} |
JSONArray photo = photos.getJSONArray("photo"); |
6. 이제 JSONArray에서 사진별 정보를 가져올 차례입니다.
예제에는 5개의 photo 정보가 있으며 각각이 JSONObject입니다.
[{"id":"15867520885","owner":"119678691@N02","secret":"69d04f6ecc","server":"7560","farm":8,"title":"Cat","ispublic":1,"isfriend":0,"isfamily":0} ,{"id":"32708232492","owner":"34505155@N05","secret":"d88434c4fa","server":"727","farm":1,"title":"Cat In Black","ispublic":1,"isfriend":0,"isfamily":0} ,{"id":"34055408873","owner":"95020224@N03","secret":"5ba1c27a46","server":"4200","farm":5,"title":"cat","ispublic":1,"isfriend":0,"isfamily":0} ,{"id":"34493121303","owner":"95020224@N03","secret":"52fe2ee5da","server":"4236","farm":5,"title":"cat","ispublic":1,"isfriend":0,"isfamily":0} ,{"id":"35127972471","owner":"95020224@N03","secret":"6730c1a382","server":"4225","farm":5,"title":"cat","ispublic":1,"isfriend":0,"isfamily":0}] |
7. JSONObject에서 항목별로 데이터를 가져와 String 변수에 저장합니다.
{"id":"15867520885","owner":"119678691@N02","secret":"69d04f6ecc","server":"7560","farm":8,"title":"Cat","ispublic":1,"isfriend":0,"isfamily":0} |
for (int i = 0; i < photo.length(); i++) {
JSONObject photoInfo = photo.getJSONObject(i);
String id = photoInfo.getString("id");
String secret = photoInfo.getString("secret");
String server = photoInfo.getString("server");
String farm = photoInfo.getString("farm");
String title = photoInfo.getString("title");
. . . . . . . . . . . . . . . . . . . . . . .
} |
8. HashMap에 키와 데이터를 넣어서 리스트 photoinfoList에 추가합니다.
리스트는 반복문 전에 클리어한 상태입니다.
photoinfoList.clear();
for (int i = 0; i < photo.length(); i++) {
. . . . . . . . . . . . . . . . . . . . .
HashMap<String, String> photoinfoMap = new HashMap<String, String>();
photoinfoMap.put("id", id);
photoinfoMap.put("secret", secret);
photoinfoMap.put("server", server);
photoinfoMap.put("farm", farm);
photoinfoMap.put("title", title);
photoinfoList.add(photoinfoMap);
} |
9. 리스트를 리스트뷰에 출력하는 UI 업데이트하기 위해서 핸들러를 실행합니다.
if (jsonParser(result)){
Message message = mHandler.obtainMessage(LOAD_SUCCESS);
mHandler.sendMessage(message);
} |
10. 어댑터의 notifyDataSetChanged() 메소드를 호출하여 연결된 리스트 photoinfoList의 내용이 변경되었음을 알립니다.
결과적으로 리스트뷰의 내용이 현재 변경되어 있는 리스트뷰 내용으로 업데이트됩니다.
private final MyHandler mHandler = new MyHandler(this);
private static class MyHandler extends Handler {
. . . . . . . . . . . . . . . . . . . . . . . .
@Override
public void handleMessage(Message msg) {
MainActivity mainactivity = weakReference.get();
if (mainactivity != null) {
switch (msg.what) {
case LOAD_SUCCESS:
mainactivity.progressDialog.dismiss();
mainactivity.adapter.notifyDataSetChanged();
break;
}
}
}
} |
리스트와 어댑터, 어댑터와 리스트뷰는 아래처럼 연결이 되어있습니다.
@Override
protected void onCreate(Bundle savedInstanceState) {
super.onCreate(savedInstanceState);
setContentView(R.layout.activity_main);
. . . . . . . . . . . . . . . . . . . . . . . . . . . . . . . . . . . . . .
photoinfoList = new ArrayList<HashMap<String,String>>();
String[] from = new String[]{"id", "title","secret","server","farm"};
int[] to = new int[] {R.id.textview_main_listviewdata1, R.id.textview_main_listviewdata2,
R.id.textview_main_listviewdata3, R.id.textview_main_listviewdata4, R.id.textview_main_listviewdata5};
adapter = new SimpleAdapter(this, photoinfoList, R.layout.listview_items, from, to);
listviewPhtoList.setAdapter(adapter); |
다음 포스팅에서는 리스트뷰의 항목을 선택시, 해당 이미지를 새로운 액티비티에 보여주는 과정을 설명하도록 하겠습니다.
3. 전체 소스 코드
activity_main.xml
사용자에게 검색할 키워드를 입력받을 EditText와 검색 시작 버튼, 그리고 리스트 뷰 상단에 보여줄 리스트의 컬럼 제목으로 구성되어 있습니다.
<?xml version="1.0" encoding="utf-8"?>
<LinearLayout
xmlns:android="http://schemas.android.com/apk/res/android"
xmlns:tools="http://schemas.android.com/tools"
android:layout_width="match_parent"
android:layout_height="match_parent"
android:orientation="vertical"
tools:context="com.tistory.webnautes.imagesearchexample.MainActivity">
<LinearLayout
android:layout_width="match_parent"
android:layout_height="20dp"
android:layout_margin="5dp"
android:orientation="horizontal">
<TextView
android:id="@+id/textview_main_listviewheader1"
android:layout_width="70dp"
android:layout_height="wrap_content"
android:text="id" />
<TextView
android:id="@+id/textview_main_listviewheader2"
android:layout_width="100dp"
android:layout_height="wrap_content"
android:text="title" />
<TextView
android:id="@+id/textview_main_listviewheader3"
android:layout_width="90dp"
android:layout_height="wrap_content"
android:text="secret" />
<TextView
android:id="@+id/textview_main_listviewheader4"
android:layout_width="60dp"
android:layout_height="wrap_content"
android:text="server" />
<TextView
android:id="@+id/textview_main_listviewheader5"
android:layout_width="30dp"
android:layout_height="wrap_content"
android:text="farm" />
</LinearLayout>
<ListView
android:id="@+id/listview_main_list"
android:layout_width="match_parent"
android:layout_height="0dp"
android:layout_weight="0.8"
android:layout_margin="5dp"/>
<EditText
android:id="@+id/edittext_main_searchkeyword"
android:layout_width="match_parent"
android:layout_height="0dp"
android:layout_weight="0.1"
android:layout_margin="5dp"
android:inputType="textPersonName"
android:text="" />
<Button
android:id="@+id/button_main_requestjson"
android:layout_width="match_parent"
android:layout_height="0dp"
android:layout_weight="0.1"
android:layout_margin="5dp"
android:text="JSON 가져오기" />
</LinearLayout> |
listview_items.xml
리스트 뷰에 여러개의 컬럼을 넣기 위해 필요한 레이아웃입니다.
<?xml version="1.0" encoding="utf-8"?>
<LinearLayout
xmlns:android="http://schemas.android.com/apk/res/android"
android:orientation="horizontal"
android:layout_width="match_parent"
android:layout_height="match_parent">
<TextView
android:id="@+id/textview_main_listviewdata1"
android:layout_width="70dp"
android:layout_height="wrap_content"
android:text="id" />
<TextView
android:id="@+id/textview_main_listviewdata2"
android:layout_width="100dp"
android:layout_height="wrap_content"
android:text="title" />
<TextView
android:id="@+id/textview_main_listviewdata3"
android:layout_width="90dp"
android:layout_height="wrap_content"
android:text="secret" />
<TextView
android:id="@+id/textview_main_listviewdata4"
android:layout_width="60dp"
android:layout_height="wrap_content"
android:text="server" />
<TextView
android:id="@+id/textview_main_listviewdata5"
android:layout_width="30dp"
android:layout_height="wrap_content"
android:text="farm" />
</LinearLayout> |
MainActivity.java
package com.tistory.webnautes.imagesearchexample;
import android.app.ProgressDialog;
import android.os.Handler;
import android.os.Message;
import android.support.v7.app.AppCompatActivity;
import android.os.Bundle;
import android.util.Log;
import android.view.View;
import android.widget.Button;
import android.widget.EditText;
import android.widget.ListView;
import android.widget.SimpleAdapter;
import org.json.JSONArray;
import org.json.JSONException;
import org.json.JSONObject;
import java.io.BufferedReader;
import java.io.InputStream;
import java.io.InputStreamReader;
import java.lang.ref.WeakReference;
import java.net.HttpURLConnection;
import java.net.URL;
import java.util.ArrayList;
import java.util.HashMap;
import java.util.List;
public class MainActivity extends AppCompatActivity {
private static final String TAG = "imagesearchexample";
public static final int LOAD_SUCCESS = 101;
private String SEARCH_URL = "https://secure.flickr.com/services/rest/?method=flickr.photos.search";
private String API_KEY = "&api_key=발급받은_API_KEY로_대체하세요";
private String PER_PAGE = "&per_page=50";
private String SORT = "&sort=interestingness-desc";
private String FORMAT = "&format=json";
private String CONTECT_TYPE = "&content_type=1";
private String SEARCH_TEXT = "&text=";
private String REQUEST_URL = SEARCH_URL + API_KEY + PER_PAGE + SORT + FORMAT + CONTECT_TYPE + SEARCH_TEXT;
private ProgressDialog progressDialog = null;
private SimpleAdapter adapter = null;
private List<HashMap<String,String>> photoinfoList = null;
private EditText searchKeyword = null;
@Override
protected void onCreate(Bundle savedInstanceState) {
super.onCreate(savedInstanceState);
setContentView(R.layout.activity_main);
Button buttonRequestJSON = (Button)findViewById(R.id.button_main_requestjson);
ListView listviewPhtoList = (ListView)findViewById(R.id.listview_main_list);
searchKeyword = (EditText)findViewById(R.id.edittext_main_searchkeyword);
photoinfoList = new ArrayList<HashMap<String,String>>();
String[] from = new String[]{"id", "title","secret","server","farm"};
int[] to = new int[] {R.id.textview_main_listviewdata1, R.id.textview_main_listviewdata2,
R.id.textview_main_listviewdata3, R.id.textview_main_listviewdata4, R.id.textview_main_listviewdata5};
adapter = new SimpleAdapter(this, photoinfoList, R.layout.listview_items, from, to);
listviewPhtoList.setAdapter(adapter);
buttonRequestJSON.setOnClickListener(new View.OnClickListener() {
@Override
public void onClick(View v) {
progressDialog = new ProgressDialog( MainActivity.this );
progressDialog.setMessage("Please wait.....");
progressDialog.show();
String keyword = searchKeyword.getText().toString();
getJSON(keyword);
}
});
}
private final MyHandler mHandler = new MyHandler(this);
private static class MyHandler extends Handler {
private final WeakReference<MainActivity> weakReference;
public MyHandler(MainActivity mainactivity) {
weakReference = new WeakReference<MainActivity>(mainactivity);
}
@Override
public void handleMessage(Message msg) {
MainActivity mainactivity = weakReference.get();
if (mainactivity != null) {
switch (msg.what) {
case LOAD_SUCCESS:
mainactivity.progressDialog.dismiss();
mainactivity.adapter.notifyDataSetChanged();
break;
}
}
}
}
public void getJSON(final String keyword) {
if ( keyword == null) return;
Thread thread = new Thread(new Runnable() {
public void run() {
String result;
try {
Log.d(TAG, REQUEST_URL+keyword);
URL url = new URL(REQUEST_URL+keyword);
HttpURLConnection httpURLConnection = (HttpURLConnection) url.openConnection();
httpURLConnection.setReadTimeout(3000);
httpURLConnection.setConnectTimeout(3000);
httpURLConnection.setDoOutput(true);
httpURLConnection.setDoInput(true);
httpURLConnection.setRequestMethod("GET");
httpURLConnection.setUseCaches(false);
httpURLConnection.connect();
int responseStatusCode = httpURLConnection.getResponseCode();
InputStream inputStream;
if (responseStatusCode == HttpURLConnection.HTTP_OK) {
inputStream = httpURLConnection.getInputStream();
} else {
inputStream = httpURLConnection.getErrorStream();
}
InputStreamReader inputStreamReader = new InputStreamReader(inputStream, "UTF-8");
BufferedReader bufferedReader = new BufferedReader(inputStreamReader);
StringBuilder sb = new StringBuilder();
String line;
while ((line = bufferedReader.readLine()) != null) {
sb.append(line);
}
bufferedReader.close();
httpURLConnection.disconnect();
result = sb.toString().trim();
} catch (Exception e) {
result = e.toString();
}
if (jsonParser(result)){
Message message = mHandler.obtainMessage(LOAD_SUCCESS);
mHandler.sendMessage(message);
}
}
});
thread.start();
}
public boolean jsonParser(String jsonString){
if (jsonString == null ) return false;
jsonString = jsonString.replace("jsonFlickrApi(", "");
jsonString = jsonString.replace(")", "");
try {
JSONObject jsonObject = new JSONObject(jsonString);
JSONObject photos = jsonObject.getJSONObject("photos");
JSONArray photo = photos.getJSONArray("photo");
photoinfoList.clear();
for (int i = 0; i < photo.length(); i++) {
JSONObject photoInfo = photo.getJSONObject(i);
String id = photoInfo.getString("id");
String secret = photoInfo.getString("secret");
String server = photoInfo.getString("server");
String farm = photoInfo.getString("farm");
String title = photoInfo.getString("title");
HashMap<String, String> photoinfoMap = new HashMap<String, String>();
photoinfoMap.put("id", id);
photoinfoMap.put("secret", secret);
photoinfoMap.put("server", server);
photoinfoMap.put("farm", farm);
photoinfoMap.put("title", title);
photoinfoList.add(photoinfoMap);
}
return true;
} catch (JSONException e) {
Log.d(TAG, e.toString() );
}
return false;
}
} |


