
TensorFlow 예제 - Keras + OpenCV를 사용하여 실제 손글씨 숫자 인식Deep Learning & Machine Learning/Keras2023. 10. 9. 11:20
Table of Contents
반응형
첫번째 코드를 실행시켜서 손글씨 숫자 MNIST 데이터로 훈련을 시킨 후, 두번째 코드에서 실제 손글씨 이미지를 로드하여 인식시켜보았습니다.
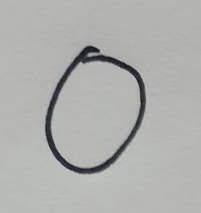
테스트시 아래 이미지를 사용했습니다.


실행결과는 다음과 같았습니다.
[0 1 2 3 4 5 6 7 8 9]
| import tensorflow as tf mnist = tf.keras.datasets.mnist (x_train, y_train),(x_test, y_test) = mnist.load_data() x_train, x_test = x_train / 255.0, x_test / 255.0 model = tf.keras.models.Sequential([ tf.keras.layers.Flatten(), tf.keras.layers.Dense(512, activation=tf.nn.relu), tf.keras.layers.Dropout(0.2), tf.keras.layers.Dense(10, activation=tf.nn.softmax) ]) model.compile(optimizer='adam', loss='sparse_categorical_crossentropy', metrics=['accuracy']) model.fit(x_train, y_train, epochs=5) model.evaluate(x_test, y_test) #-------------------------------------------------------------------------- model.save_weights('/tmp/mnist_checkpoint') |
| import tensorflow as tf import cv2 import numpy as np import math from scipy import ndimage def getBestShift(img): cy,cx = ndimage.measurements.center_of_mass(img) rows,cols = img.shape shiftx = np.round(cols/2.0-cx).astype(int) shifty = np.round(rows/2.0-cy).astype(int) return shiftx,shifty def shift(img,sx,sy): rows,cols = img.shape M = np.float32([[1,0,sx],[0,1,sy]]) shifted = cv2.warpAffine(img,M,(cols,rows)) return shifted # 10개의 이미지를 위한 배열을 생성 images = np.zeros((10, 784)) i = 0 for no in range(10): # 10개의 이미지를 입력 받음 gray = cv2.imread(str(no) + ".png", 0) gray = cv2.resize(gray, (28, 28), interpolation=cv2.INTER_AREA) cv2.imwrite("0_" + str(no) + ".png", gray) (thresh, gray) = cv2.threshold(gray, 0, 255, cv2.THRESH_BINARY_INV | cv2.THRESH_OTSU) cv2.imwrite("1_" + str(no) + ".png", gray) while np.sum(gray[0]) == 0: gray = gray[1:] while np.sum(gray[:, 0]) == 0: gray = np.delete(gray, 0, 1) while np.sum(gray[-1]) == 0: gray = gray[:-1] while np.sum(gray[:, -1]) == 0: gray = np.delete(gray, -1, 1) rows, cols = gray.shape cv2.imwrite("2_" + str(no) + ".png", gray) if rows > cols: factor = 20.0 / rows rows = 20 cols = int(round(cols * factor)) # first cols than rows gray = cv2.resize(gray, (cols, rows)) else: factor = 20.0 / cols cols = 20 rows = int(round(rows * factor)) # first cols than rows gray = cv2.resize(gray, (cols, rows)) colsPadding = (int(math.ceil((28 - cols) / 2.0)), int(math.floor((28 - cols) / 2.0))) rowsPadding = (int(math.ceil((28 - rows) / 2.0)), int(math.floor((28 - rows) / 2.0))) gray = np.lib.pad(gray, (rowsPadding, colsPadding), 'constant') cv2.imwrite("3_" + str(no) + ".png", gray) shiftx, shifty = getBestShift(gray) shifted = shift(gray, shiftx, shifty) gray = shifted cv2.imwrite("4_" + str(no) + ".png", gray) flatten = gray.flatten() / 255.0 images[i] = flatten i += 1 model = tf.keras.models.Sequential([ tf.keras.layers.Flatten(), tf.keras.layers.Dense(512, activation=tf.nn.relu), tf.keras.layers.Dropout(0.2), tf.keras.layers.Dense(10, activation=tf.nn.softmax) ]) model.load_weights('/tmp/mnist_checkpoint') predictions = model.predict(images) with tf.Session() as sess: print(tf.argmax(predictions, 1).eval()) |
참고한 코드
https://github.com/opensourcesblog/tensorflow-mnist/blob/master/mnist.py
https://www.tensorflow.org/tutorials/
마지막 업데이트 - 2018. 11. 7
반응형
'Deep Learning & Machine Learning > Keras' 카테고리의 다른 글
| tf.keras.applications.EfficientNet 모델 사용시 주의할 점 (0) | 2023.10.10 |
|---|---|
| Keras와 OpenCV를 사용하여 손글씨 숫자 인식하기 (0) | 2023.10.09 |
| Keras 모델을 TensorFlow Lite로 변환하기 (h5 -> pb -> tflite) (0) | 2022.10.23 |
| Keras Tuner를 사용하여 하이퍼파라미터 찾는 예제 (0) | 2022.02.20 |
| Keras - Data Augmentation 이미지로 확인해보기 (0) | 2021.06.29 |


