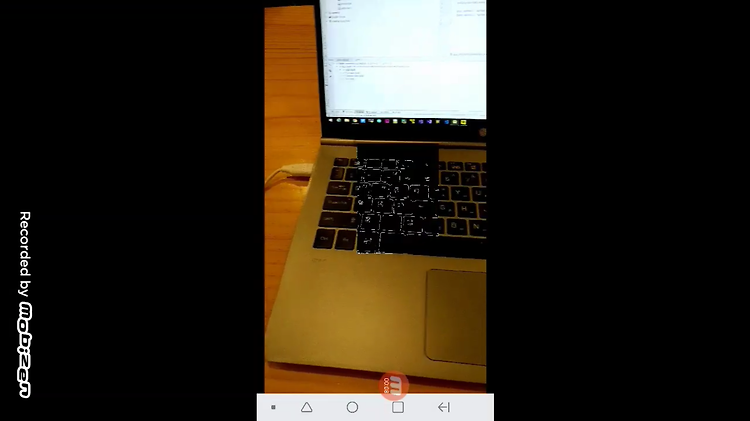

카메라로부터 캡처된 영상에 관심영역(ROI)을 지정하여 영상처리 하는 예제입니다.
위치는 텍스트로된 코드에서 확인하고 코드 복사는 코드블록에 있는 것을 사용하세요.
업데이트
2019. 5. 11
유튜브 영상 또는 아래 글을 보고 진행하세요.
아래 포스팅 진행한 후 필요한 부분을 추가해서 완성합니다.
Android NDK + OpenCV 카메라 예제 및 프로젝트 생성방법(CMake 사용)
https://webnautes.tistory.com/1054
추가 1 : MainActivity.java
public class MainActivity extends AppCompatActivity

       implements CameraBridgeViewBase.CvCameraViewListener2, View.OnTouchListener {
public class MainActivity extends AppCompatActivity
implements CameraBridgeViewBase.CvCameraViewListener2, View.OnTouchListener {추가 2 : MainActivity.java
private Mat matInput;
private Mat matResult;
   private Mat matInput1, matInput2;
   private Mat matMask=null, matNotMask=null;
   Rect rect = new Rect();
   private int step = -1;
private Mat matInput1, matInput2;
private Mat matMask=null, matNotMask=null;
Rect rect = new Rect();
private int step = -1;추가 3 : MainActivity.java
@Override
protected void onCreate(Bundle savedInstanceState) {
. . . . . . . . . . . . . . . . . . .
mOpenCvCameraView.setOnTouchListener(this);
mOpenCvCameraView.setOnTouchListener(this);추가 4 : MainActivity.java
@Override
public Mat onCameraFrame(CameraBridgeViewBase.CvCameraViewFrame inputFrame) {
matInput = inputFrame.rgba();
if ( matResult == null )
matResult = new Mat(matInput.rows(), matInput.cols(), matInput.type());
       if ( matInput1 == null )
           matInput1 = new Mat(matInput.rows(), matInput.cols(), matInput.type());

       if ( matInput2 == null )
           matInput2 = new Mat(matInput.rows(), matInput.cols(), matInput.type());

       if ( matNotMask == null )
           matNotMask = new Mat(matInput.rows(), matInput.cols(), matInput.type());


       if ( step == 1){

           Imgproc.circle(matInput, new Point(rect.x, rect.y),  20, new Scalar(0, 255, 0, 255), -1);
           return matInput;

       }else if (step == 2){

           if (matMask != null ) {
               Core.bitwise_and(matInput, matMask, matInput1);
               ConvertRGBtoGray(matInput1.getNativeObjAddr(), matInput1.getNativeObjAddr());

               if ( matMask == null || matNotMask == null ){
                   return matInput;
               }

               Core.bitwise_not(matMask, matNotMask);
               Core.bitwise_and(matInput, matNotMask, matInput2);
               Imgproc.cvtColor(matInput1, matInput1, Imgproc.COLOR_GRAY2RGBA);
               Core.bitwise_or(matInput1, matInput2, matResult);

               return matResult;
           }

       }

       return matInput;

   }
if ( matInput1 == null )
matInput1 = new Mat(matInput.rows(), matInput.cols(), matInput.type());
if ( matInput2 == null )
matInput2 = new Mat(matInput.rows(), matInput.cols(), matInput.type());
if ( matNotMask == null )
matNotMask = new Mat(matInput.rows(), matInput.cols(), matInput.type());
if ( step == 1){
Imgproc.circle(matInput, new Point(rect.x, rect.y), 20, new Scalar(0, 255, 0, 255), -1);
return matInput;
}else if (step == 2){
if (matMask != null ) {
Core.bitwise_and(matInput, matMask, matInput1);
ConvertRGBtoGray(matInput1.getNativeObjAddr(), matInput1.getNativeObjAddr());
if ( matMask == null || matNotMask == null ){
return matInput;
}
Core.bitwise_not(matMask, matNotMask);
Core.bitwise_and(matInput, matNotMask, matInput2);
Imgproc.cvtColor(matInput1, matInput1, Imgproc.COLOR_GRAY2RGBA);
Core.bitwise_or(matInput1, matInput2, matResult);
return matResult;
}
}
return matInput;
}추가 5 : MainActivity.java
@Override

   public boolean onTouch (View v, MotionEvent event){

       int width = matInput.cols();
       int height = matInput.rows();

       // 카메라 뷰와 이미지 좌표 맞추기
       int xOffset = (mOpenCvCameraView.getWidth() - width) / 2;
       int yOffset = (mOpenCvCameraView.getHeight() - height) / 2;

       int x = (int) event.getX() - xOffset;
       int y = (int) event.getY() - yOffset;

       if (x < 0 || y < 0 || x >= width || y >= height) {// 터치가 범위 벗어난 경우

           step = -1;
           rect.x = rect.y = rect.width = rect.height = 0;
           matMask = null;
           return false;
       }


       if ( step == 2) { // ROI 설정된 상태에서 또 터치하면 설정 취소
           step = -1;
           rect.x = rect.y = rect.width = rect.height = 0;
           matMask = null;
           return false;
       }


       if ((step == -1)&&((rect.x == 0 && rect.y == 0) || (rect.width != 0 && rect.height != 0))) { //첫번째 클릭

           step = 1;
           matMask = null;
           rect.x = x;
           rect.y = y;
           rect.width = rect.height = 0;

       } else if ( step == 1){  //두번째 클릭

           rect.width = x - rect.x;
           rect.height = y - rect.y;

           if (rect.width <= 0 || rect.height <= 0) {  // 잘못 두번쨰 좌표 선택한 경우 취소
               step = -1;
               rect.x = rect.y = rect.width = rect.height = 0;
               matMask = null;
               return false;
           }

           step = 2;
           matMask = null;
           matMask = Mat.zeros(matInput.size(), matInput.type());
           matMask.submat(rect).setTo(Scalar.all(255));
       }

       return false;
   }
@Override
public boolean onTouch (View v, MotionEvent event){
int width = matInput.cols();
int height = matInput.rows();
// 카메라 뷰와 이미지 좌표 맞추기
int xOffset = (mOpenCvCameraView.getWidth() - width) / 2;
int yOffset = (mOpenCvCameraView.getHeight() - height) / 2;
int x = (int) event.getX() - xOffset;
int y = (int) event.getY() - yOffset;
if (x < 0 || y < 0 || x >= width || y >= height) {// 터치가 범위 벗어난 경우
step = -1;
rect.x = rect.y = rect.width = rect.height = 0;
matMask = null;
return false;
}
if ( step == 2) { // ROI 설정된 상태에서 또 터치하면 설정 취소
step = -1;
rect.x = rect.y = rect.width = rect.height = 0;
matMask = null;
return false;
}
if ((step == -1)&&((rect.x == 0 && rect.y == 0) || (rect.width != 0 && rect.height != 0))) { //첫번째 클릭
step = 1;
matMask = null;
rect.x = x;
rect.y = y;
rect.width = rect.height = 0;
} else if ( step == 1){ //두번째 클릭
rect.width = x - rect.x;
rect.height = y - rect.y;
if (rect.width <= 0 || rect.height <= 0) { // 잘못 두번쨰 좌표 선택한 경우 취소
step = -1;
rect.x = rect.y = rect.width = rect.height = 0;
matMask = null;
return false;
}
step = 2;
matMask = null;
matMask = Mat.zeros(matInput.size(), matInput.type());
matMask.submat(rect).setTo(Scalar.all(255));
}
return false;
}추가 6 : native-lib.cpp
Mat &matInput = *(Mat *)matAddrInput;
Mat &matResult = *(Mat *)matAddrResult;
cvtColor(matInput, matResult, COLOR_RGBA2GRAY);
   blur( matResult, matResult, Size(5,5));
   Canny( matResult, matResult, 50, 150);
blur( matResult, matResult, Size(5,5));
Canny( matResult, matResult, 50, 150);참고
https://answers.opencv.org/question/55734/opencv-area-selection-on-live-camera-feed/
'OpenCV > Android 개발 환경 및 예제' 카테고리의 다른 글
| Android NDK + CMake + OpenCV 카메라 예제 프로젝트 생성방법 (1) | 2023.11.26 |
|---|---|
| OpenCV, Android, NDK 를 사용하여 Android에서 Face Detection(얼굴 검출) (7) | 2023.10.14 |
| Android 용으로 OpenCV 4.4.0 빌드하는 방법 (Build OpenCV 4.4.0 for Android ) (255) | 2020.09.27 |
| OpenCV 강좌 - 안드로이드 폰에서 딥러닝 네트워크(deep learning network) 실행하기 (Caffe) (10) | 2019.08.27 |
| Android OpenCV 예제 - SURF를 사용한 오브젝트 검출 테스트 (57) | 2019.05.21 |


